Key Takeaways
- Ensure HVAC compatibility, check for a C-wire, and select an ideal location before installation.
- Always turn off your HVAC system at the breaker panel or master switch before installation.
- Most smart thermostats can be easily installed as a DIY project.
As energy costs continue to spiral upward, we’re all seeking smarter, more efficient ways to save on bills. This is where smart thermostats step in, offering unparalleled control over your home climate with just a few clicks on your phone.
By automating temperature changes throughout the day to coincide with usage patterns, smart thermostats can help you tackle rising energy prices. Not to mention, you can track HVAC runtime, which helps to tailor your usage habits and minimize energy consumption.
Another top benefit of smart thermostats is their super easy installation process. While it may seem daunting at first considering all the different wires and configuration, many homeowners can DIY the process with the help of the right tools and instructions. Save yourself high-end expenditure on hiring a tech!
Some smart thermostat companies even have their own support teams that you can reach out to on call or email, and they guide you with step-by-step installation instructions – Cielo Support is pretty famous.
This comprehensive guide will explain everything you need to know about smart thermostat installation. From what factors to consider before purchasing a smart thermostat to detailed instructions on how to set it up!
Before Installing a New Smart Thermostat
Here are some things to take into account before installing a smart thermostat.
● Ensure Compatibility With Your HVAC System
Ensure the smart thermostat is compatible with your HVAC system. Inspecting the wiring for this is essential and can be accessed by removing your current thermostat. You will need to:
- Switch off the breaker to power off your HVAC system.
- Remove the thermostat.
- Inspect the wire setup. You need to check which wires you have and the presence of a C or G, or Y wire. Take a picture, it’ll come in handy.
- Visit your smart thermostat manufacturer’s compatibility page and compare the wires on your thermostat.
Ensuring compatibility will save you time and money and also prevent any unnecessary complications or safety hazards.
Many smart thermostat manufacturers provide online compatibility tools to help you determine if their models are suitable for your HVAC system.
Most smart thermostats are able to work with more than 85% of systems running on various heating and cooling sources such as gas, oil, and electricity.
Almost all smart thermostats require a c-wire adapter that usually comes inside the box, though if unavailable, simply purchasing a c-wire can solve the problem. Exceptions arise when high-voltage wires are required.
You can also check for these indicators on your old thermostat’s backplate.
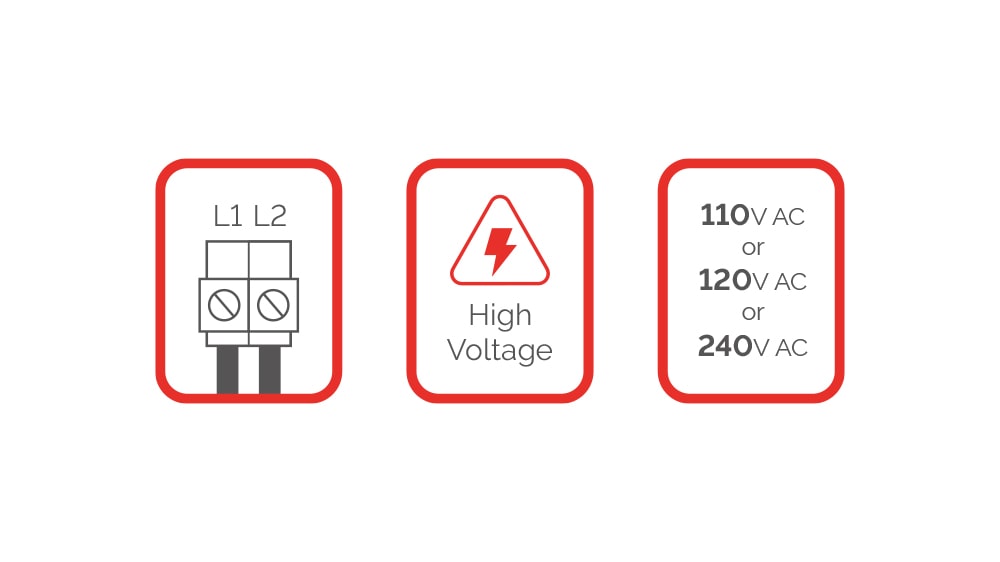
If you find any of these signs, stop the installation process. Most smart thermostats work with 24V AC and are incompatible with high-voltage or millivolt systems.
● Choose a Suitable Location for New Thermostat
View this post on Instagram
Your thermostat senses your home’s ambient temperature and sends signals to your HVAC to regulate your home temperature. External factors such as cold drafts, heat, and direct sunlight can affect the thermostat reading.
Your thermostat may sense it is warmer or cooler than it actually is. This results in your unit running more than required or not long enough to maintain your preferred home climate.
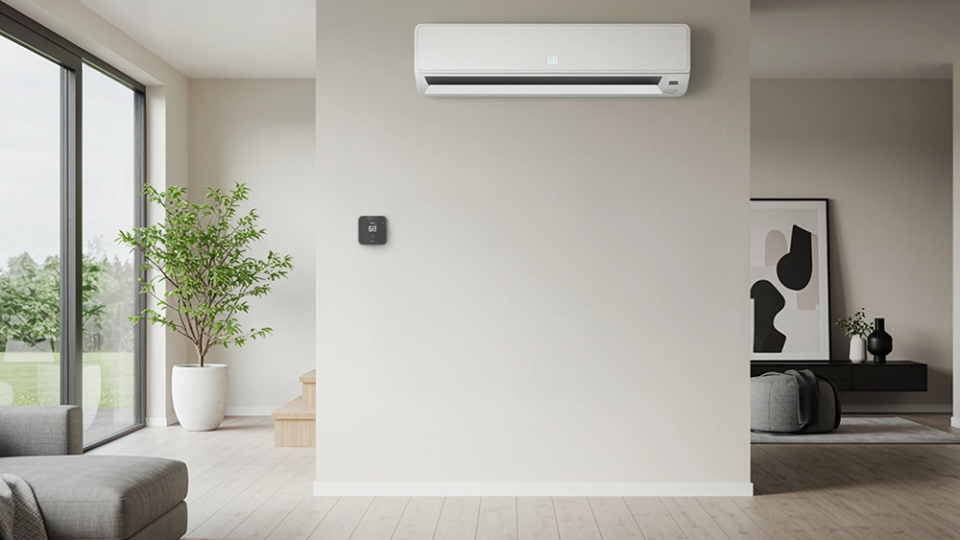
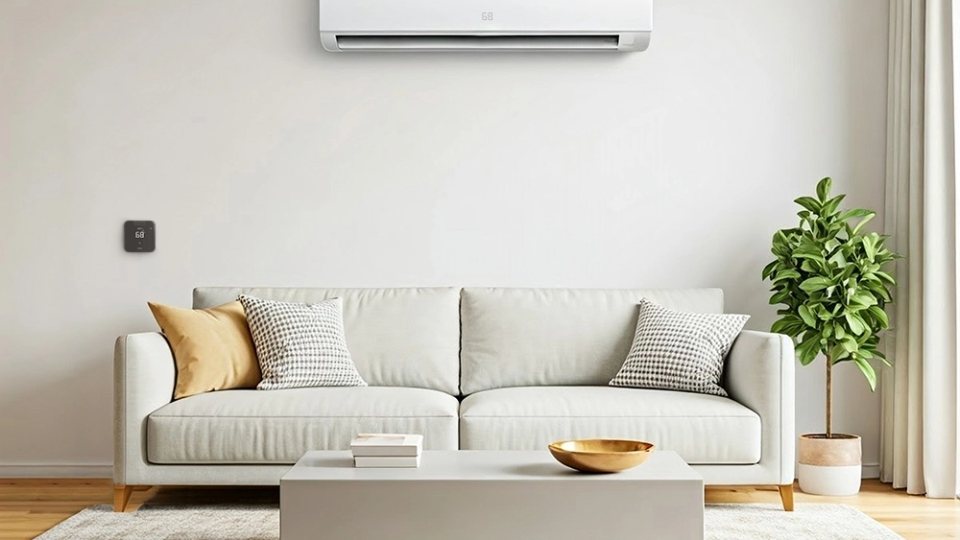
The best thermostat placement for comfort and efficiency is on an interior wall in a central location, such as your living room. This better reflects your home’s climate and allows for accurate readings without any fluctuations.
Also, make sure your smart WiFi thermostat is in the WiFi range, as it requires a constant internet connection for optimal functionality.
Prior to starting your installation process, it’s important to check the location of your old thermostat. If it isn’t installed in the correct area, it’s recommended that you choose another location for the new thermostat.
Unfortunately, you will have to call a technician for that, as it will require running the wires from your HVAC to the new position.
● Check if Your Home Has a C-Wire
A C-Wire, short for common wire, ensures your thermostat receives consistent power from your HVAC system. Unlike traditional thermostats, smart thermostats require a constant electricity supply to power their displays, which show important data such as temperature, humidity, and other settings.
They also need to remain powered on to receive commands over WiFi and work with other smart home devices such as Google Assistant or Alexa.
To check if you have a C-Wire, remove your thermostat faceplate. You will see various wires inside. Check for a black or blue wire connected to a C terminal. It’s possible that it isn’t connected to your old thermostat and is pushed back toward the wall.
If you still haven’t found it, check your HVAC control board. Locate the wire attached to a C terminal. If you spot it, the smart thermostat installation process will be pretty straightforward.
In case there isn’t one, you have the following options:
- Install a new C-wire from the HVAC system to the thermostat. But keep in mind that it will have to be fished through a wall, ceiling, or floor and will require a lot of work, and can be costly.
- Opt for a C-wire adapter (CWA). The adapter kit is the best solution for adding a C-wire to your system. You simply have to install it onto your HVAC control board. Some smart thermostats provide CWA in the box without any additional cost.
- You can also go for a battery-operated thermostat. However, they may not be as accurate as the wired ones. As a result, you may notice incorrect thermostat readings, and your home climate can suffer.
● Avoid Replacing Your Thermostat When You Need it the Most
Try not to replace your old thermostat during extreme weather conditions. If anything goes wrong during installation, you will be left without a heating/cooling system. It’s also best to avoid new installations prior to an important event at your home.
Smart Thermostat Installation Guide
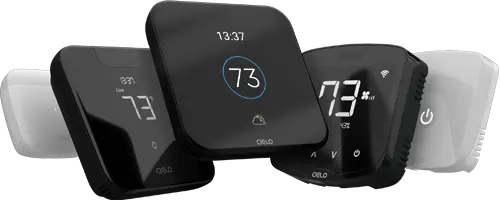
Learn how to install a smart thermostat with these easy-to-follow steps. Follow along and enjoy the benefits of a smarter home climate in no time! If you have a Cielo Smart Thermostat Eco, check out this detailed installation guide.
Equip your HVAC system with smart features and achieve the perfect balance between comfort & savings.
Learn more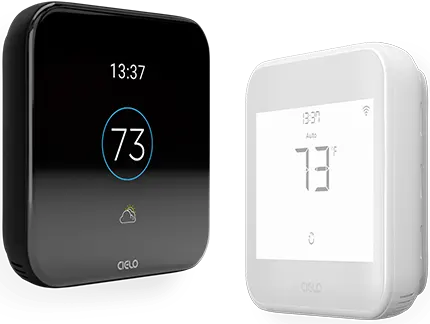
Tools & Materials Required
| Tools | Materials |
| Drill for mounting drywall anchors | Smart thermostat |
| Screws | C-wire adapter (In case C-wire isn’t present) |
| Screwdriver | Dry anchor walls (may be included in the thermostat box) |
| Pencil | |
| Wire label sheet (may be included in the box) |
Step-by-Step Instructions on How to Install a Smart Thermostat
1. Power off Your HVAC Unit
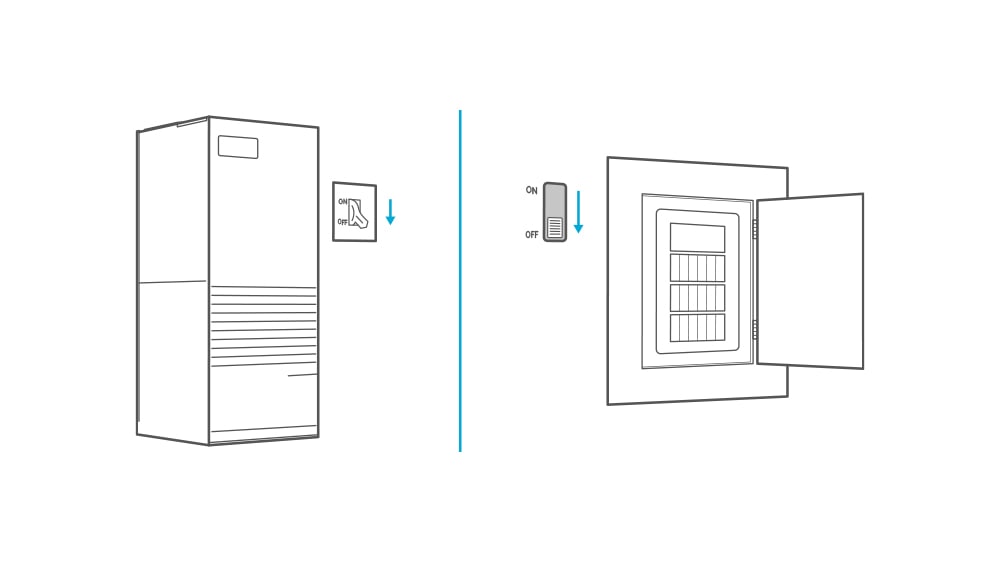
Before installing your smart thermostat, turn off your HVAC system at the breaker panel. You can also shut it down using the master switch. As the installation process involves wires, cutting off the power is crucial to avoid any accidents.
To make sure your unit is actually off, put your hands in front of the air vents and check for airflow. You can also try turning up your thermostat and see if your system responds. If it doesn’t, you are good to go. If you have a boiler, check if the main flame is extinguished.
2. Remove the Old Faceplate
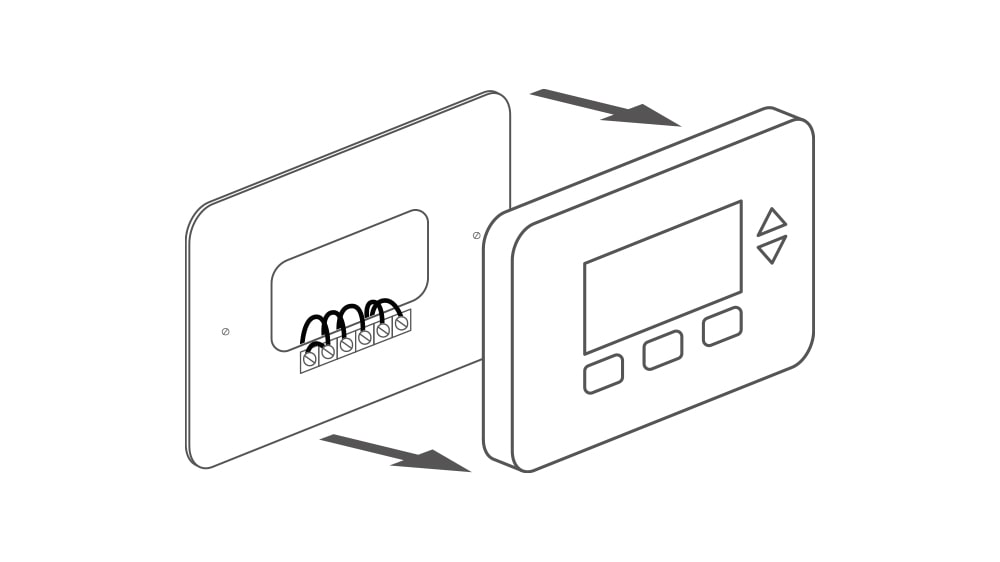
You will need to remove the thermostat faceplate to get access to the thermostat wiring. In some thermostats, the process is as simple as removing a cover. If you notice that the faceplate isn’t coming off, don’t apply force to remove it, as it can break the cover and even damage the wiring inside.
Instead, check for screws at the lower side of the plate. You will have to unscrew to remove the faceplate. If you are still having issues, contact a professional for help.
3. Take a Picture of the Wiring System
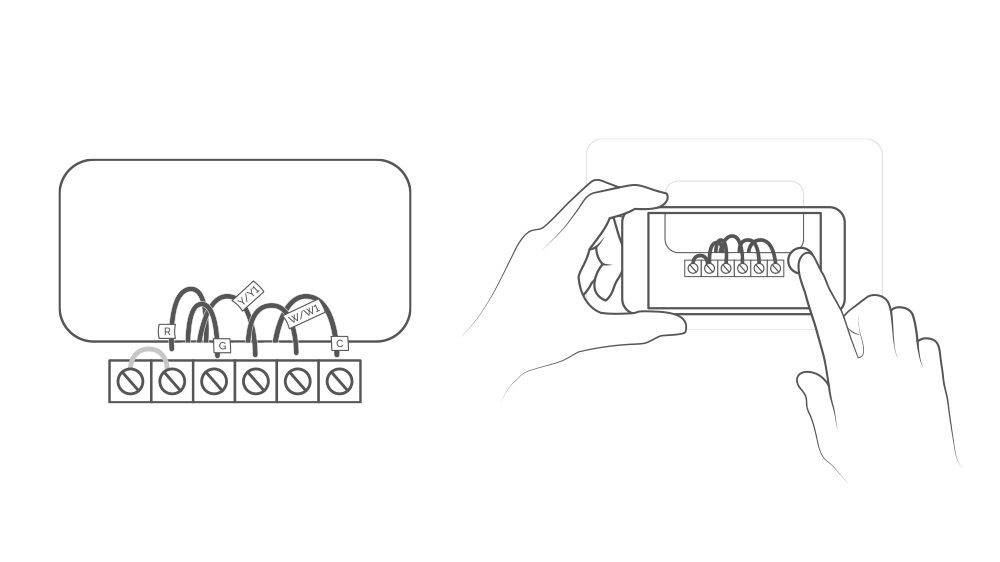
When the faceplate is removed, you will see all these wires inside. It’s best to take a picture so you have a visual of which wires are connected to which terminals. You can use this as a reference when installing your smart thermostat.
You may also use a label sticker sheet that some thermostats provide in the box. Label the wires using the sheet before disconnecting them.
| Wire | Thermostat Terminal |
| White | W |
| Yellow | Y |
| Green | G |
| Red | R, Rc, or Rh |
| Blue/Black | C |
4. Disconnect the Wires
To disconnect, you will have to pull out the screws that hold the wires. Ensure the wires do not fall back inside after you disconnect them. You can prevent this by taping them to the wall or wrapping them around pencils. You can also even tie fishing lines to the wires.
5. Remove the Backplate
To remove the backplate, simply remove the screws using a screwdriver, and it will slide off. If there are holes left by the old thermostat or you have chipped paint, you can hide it using a wall or trim plate that comes with most thermostats.
6. Connect the C-Wire Adapter (If You Don’t Have a C-Wire)
You can skip this step if your home already has a C-wire. If you don’t have it, follow these instructions.
Take the following tools and go to your HVAC indoor unit:
- C-wire adapter
- Wire labels
- Smartphone
Note: Exercise caution when working with the HVAC unit.
Remove your HVAC cover to access the control board. Take a picture of the wires, as you will need it later. Your unit should have these wires to work with the C-wire adapter:
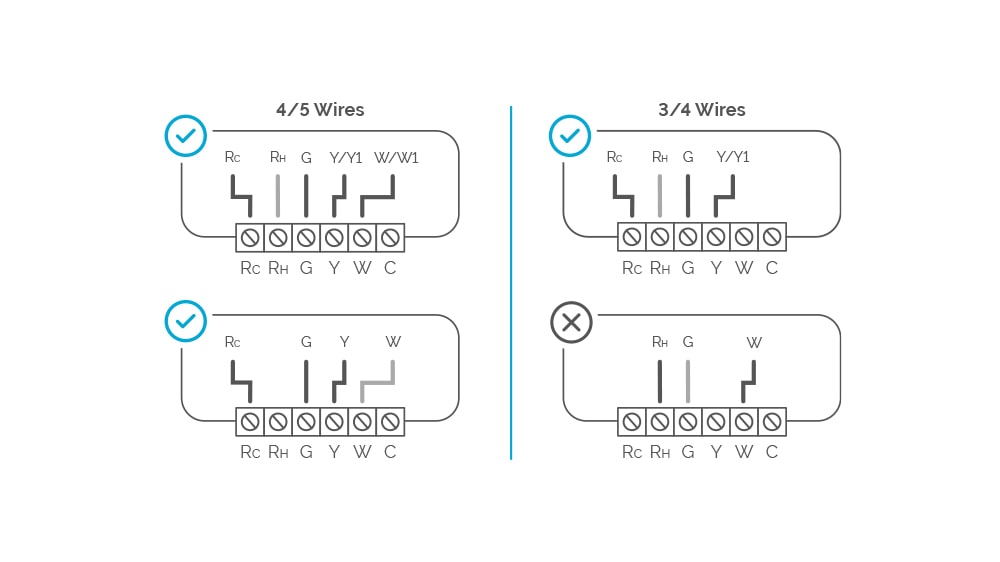
Label the following wires in this manner:
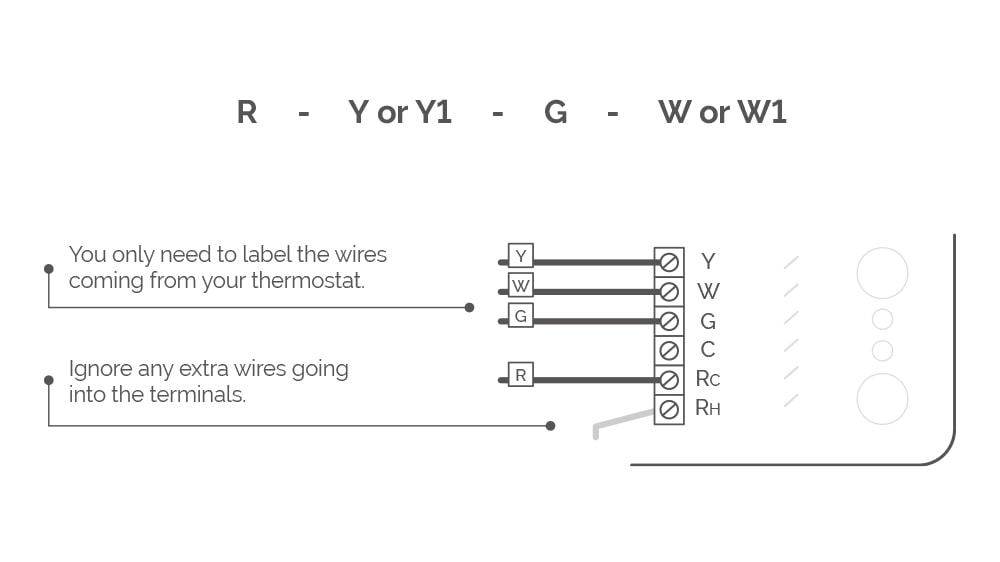
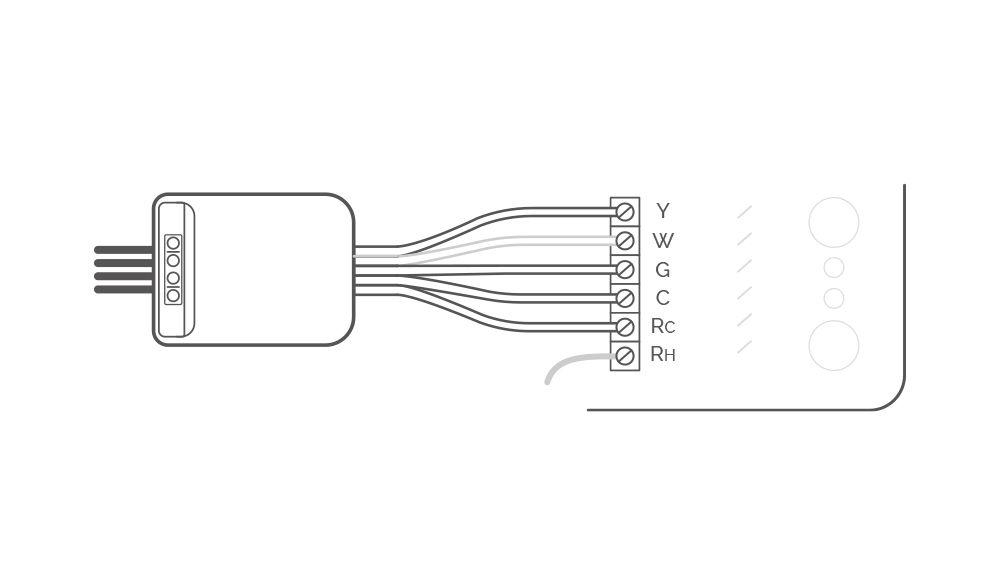
After that, disconnect the labeled R, Y, G, and W wires from the control board. Then connect these wires to their matching terminal on the C-wire adapter.
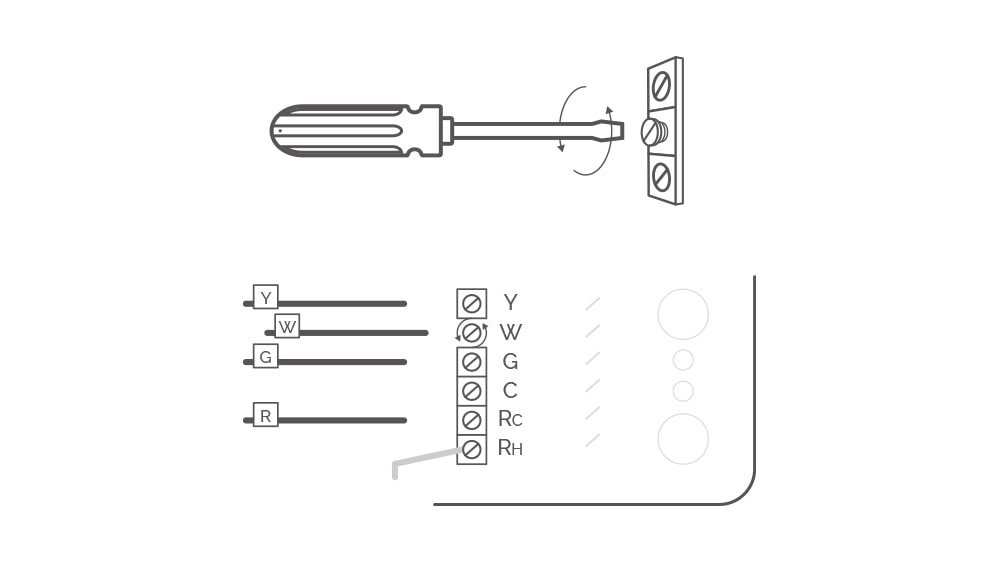
The last step in this process is to connect all the wires coming out of the C-wire adapter to the terminals on the control board of your HVAC. Then place your adapter inside the HVAC unit and close the cover.
7. Install the New Backplate
Take the new thermostat backplate, place it against the wall in place of your old thermostat, and mark the areas for the backplate screws. Dill the holes in the marked area. Then install the backplate using the drywall anchors and screws. Make sure to pull the thermostat wires from the holes in the new backplate before screwing it into the wall.
8. Connect the Wires
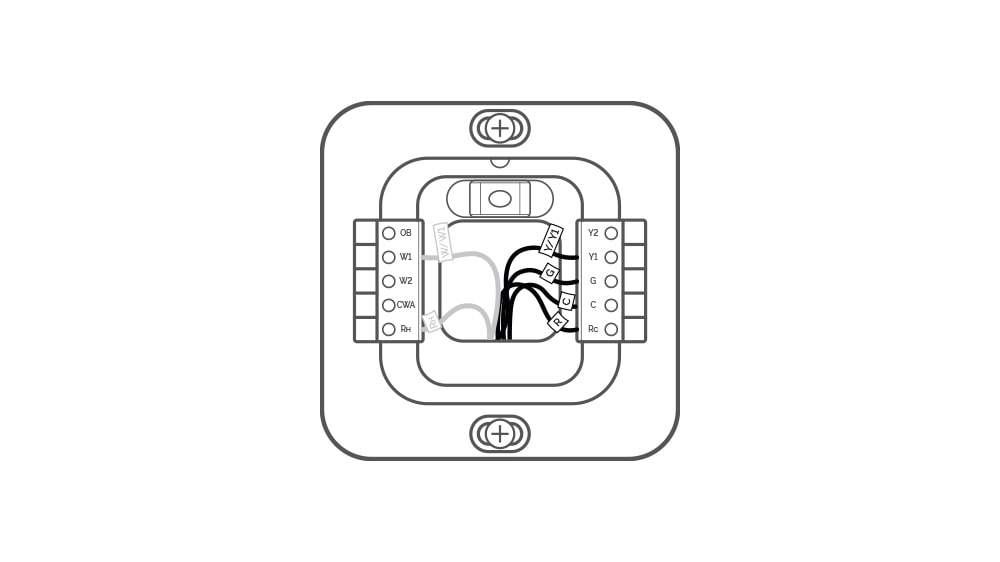
After installing the backplate, connect the wires to their corresponding terminals. The labeling you did earlier will come in handy at this step. You can also take help from the picture you took earlier.
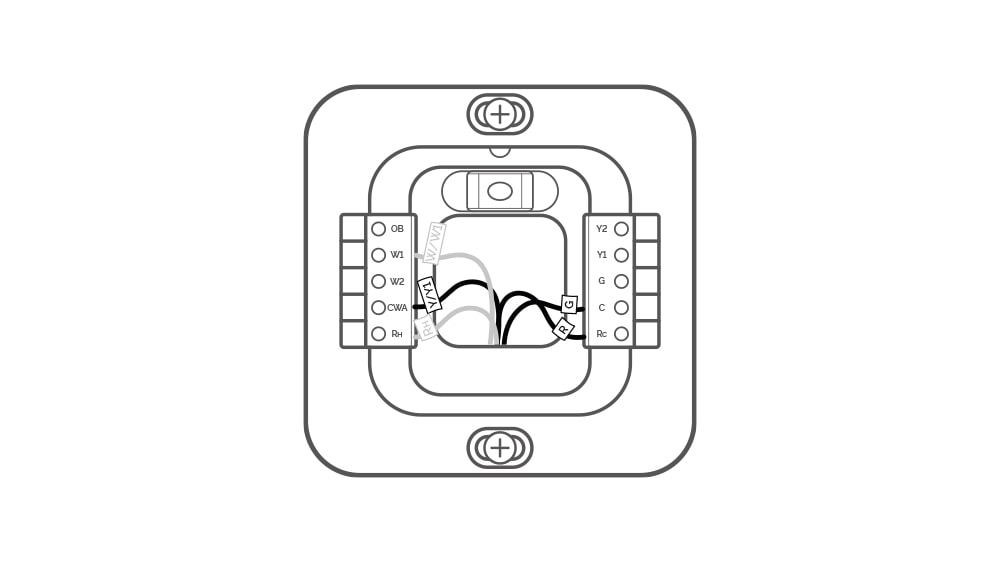
Connecting Wires to the Thermostat: (If You Don’t Have a C-Wire and Used a C-Wire Adapter)
If you are using a C-wire adapter, connect the wires as shown below.

Then connect the remaining wires to their terminals. After that, push the extra wires into the center hole of the backplate. This is to ensure that no drafts are coming from the hole.
Connecting Wires to the Thermostat (If You Have a C-Wire and Didn’t Install a C-wire Adapter)
If you notice you have more than one R-wire, insert your wires like this:
- If you have both R and Rc, put Rc in Rc terminal, and R in Rh terminal.
- In case of R and Rh, R will go into Rc and Rh into Rh.
- In case of R and Rc, Rc goes to Rc terminal and R in Rh.
- If you have Rc and Rh, they go into their own terminals.
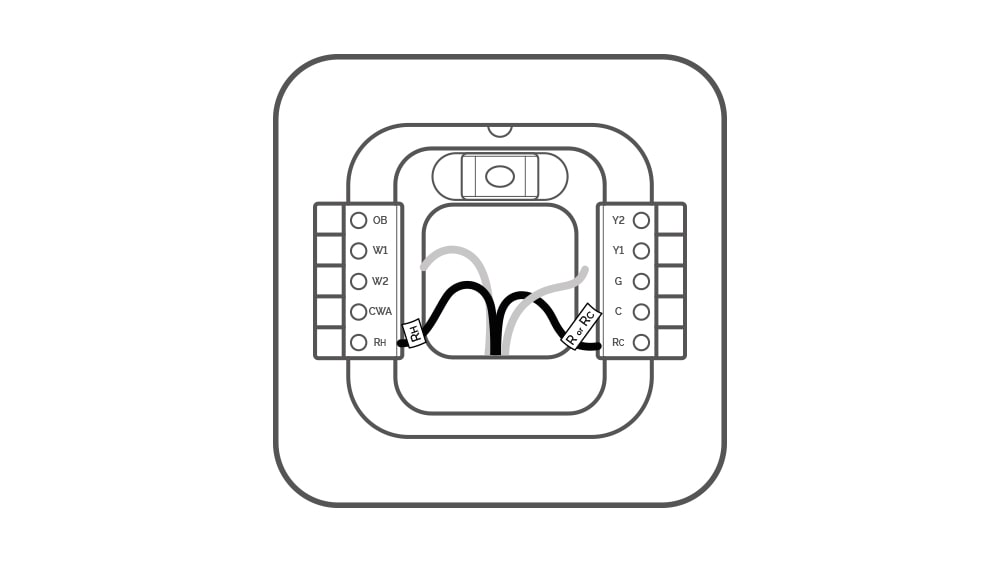
In case you have a single R-wire, insert your single R, RC, or RH wire into the RC terminal.
Then insert the remaining wires into their corresponding terminals, as shown in the image.
9. Install the Faceplate
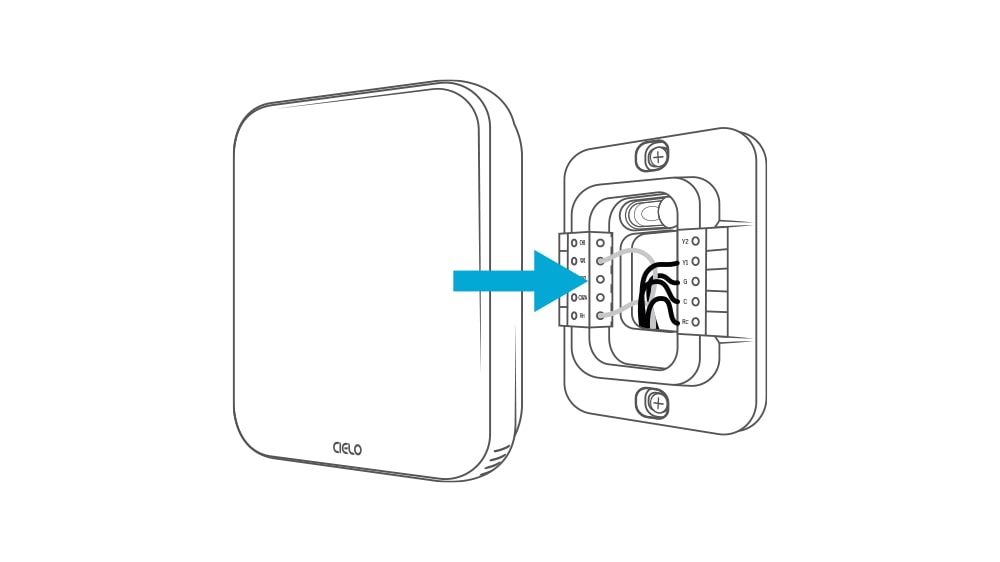
Take out the faceplate of your new thermostat and install it over the backplate, making sure all the wires are in place. If they are coming in the way, put them back inside before installing the faceplate.
10. Turn On Your HVAC System
Switch on the power using the circuit breaker or the main switch, depending on which one you initially turned off.
11. Setup Your Smart Thermostat
After powering on your new smart thermostat, follow the onscreen instructions to set it up and connect to the WiFi and the mobile app. Keep in mind that the instruction can vary depending on the brand and model.
Get ready to experience home climate automation and optimal comfort like never before!
Check out this detailed installation video of the Cielo Smart Thermostat by a master HVAC technician – David Coleman.
Smart Thermostat Installation FAQs
Get answers to your burning questions and ensure a successful installation with the help of this FAQ guide.
Related: How Do Smart Thermostats Work & Other Frequently Asked Questions
1. How Long Does the Installation Process Take?
Installing a smart thermostat is a straightforward process, and you can install most devices in less than 30 minutes. However, if you have limited DIY skills and require professional help, this may lengthen the installation time.
2. How Much Does Smart Thermostat Installation Cost?
On average, smart thermostat installation costs around $350. The cost will vary depending on the brand, electrical wiring, and type of professional you hire for the installation. If you have to add a C-wire, you will have to pay an extra $50 to $100 per hour for labor costs.
Installing a smart thermostat yourself will save you around $100. You just have to pay for the device cost plus for any tools that you may require.
3. Can You Replace Your Old Thermostat With a Smart Thermostat?
You can replace your thermostat with a smart one if it’s a low-voltage thermostat and is connected to a five-wire thermostat cable. Even if there’s no five-wire cable, you can install it after adding a C-wire or a C-wire adapter.
4. Is It Difficult to Move a Thermostat to a New Location?
Moving your thermostat can vary in difficulty based on its new location. For example, if you are just changing the placement in the same room, that would be fairly easy as the wires can reach there.
However, relocating the thermostat to a different room is a more involved process and will require professional assistance in running the wires from the HVAC to the new location.
5. Where Should You Avoid Placing the Thermostat?
When it comes to placing your thermostat for optimal efficiency, avoid placing your thermostat in areas that do not reflect your average home temperature. For example, a thermostat located in a kitchen, hallway, or near drafty doors and windows will not accurately represent your home climate.
In addition, your thermostat should always be away from any heat sources, such as direct sunlight, lamps, or electrical appliances. Also, placing it anywhere near vents or registers will give you inaccurate temperature readings.
Upgrade to Smart Thermostat to Boost Efficiency & Savings
A smart thermostat can help you to create a perfect indoor climate while helping to lower your electricity bills. Installing a thermostat is a simple DIY task that you can do yourself without requiring any professional assistance. Before starting the installation process, make sure your HVAC system is compatible with a smart thermostat and check if your home has a C-wire or not. It’s best to go through all the instructions beforehand and familiarize yourself with the wiring system. Additionally, make sure to select the proper location for your thermostat in order to avoid any potential issues down the line. By following this comprehensive installation guide, you can ensure that you have everything you need to get the job done effectively!
