Key Takeaways
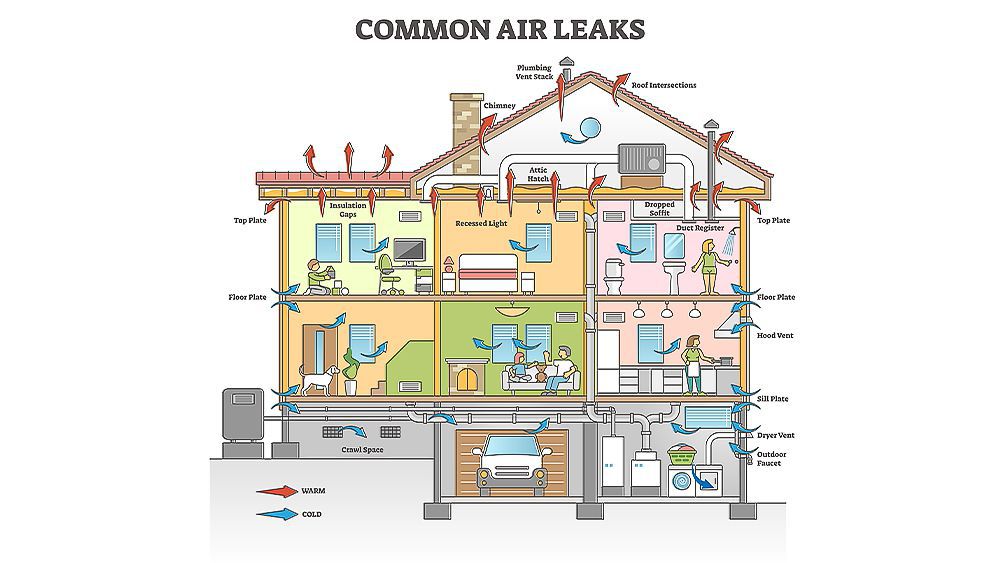
- Common sources of air leaks are attic hatches, chimneys, windows, doors, and ductwork.
- Use tests like blower door or incense smoke to find air leaks in your home.
- Sealing leaks helps boost energy efficiency and reduce utility bills.
If you’ve been noticing fluctuating home temperature recently and you feel drafts coming in through windows and doors, it may be time to learn how to find air leaks in your house and get them fixed.
Yes, air leaks are the culprits here; they can disrupt your ideal home temperature and cost you tons on energy bills. Your HVAC system keeps running to condition the air inside your home, which is wasted if it can easily slip through cracks and gaps. This makes your unit work harder, resulting in high electricity costs and a reduced lifespan of your AC unit.
Drafts are most commonly found around doors and windows, but leaks in attic and basement areas can also cause bigger issues. According to the EPA, air sealing will lower your heating and cooling costs by an average of 15%.
Common Sources of Air Leaks in Your Home

Here’s a list of some common air leaks sources inside your home so you can conduct a better inspection when finding air leaks in your house:
- Attic hatch
- Pipes and wires
- Plumbing vent
- Furnace flue
- Top of basement walls
- Wiring holes
- Chimneys
- Recessed lighting
- Electrical and gas service entrances
- Ductwork
- Duct chase way (the hollow box or wall feature that hides ducts)
- Basement rim joists
- Windows and doors
- Baseboards
- Outdoor faucets
- Shaft for piping
- Garage and living space walls
- Porch roof
- Exterior wall penetrations
8 Ways to Find Air Leaks in Your House
For accurate assessment of air leaks, consider hiring a qualified technician for a home energy audit and conducting a blower door test. There are also numerous other ways you can find the air leaks in your house yourself.
1. Blower Door Test
This test is used by professionals and entails completely sealing your home and then blowing a special fan for depressurization. The blower fan is installed in the doorway, and it blows air out your house. This causes low pressure indoors, prompting the high outside pressure to force the air through leaks and gaps inside. This helps detect leaks in your home and can also determine which areas require additional insulation.
Your best choice to make any mini-split, window,
or portable AC smart. Enhance your comfort and savings.

2. Visual Inspection
Overtime, your insulation materials such as caulking and weather stripping can wear off thus requiring reapplication. Conduct a thorough visual inspection to check if the insulating materials applied before are intact.
- Check areas outside your home – Cracks and gaps are usually found in areas where two different building materials meet. For example, where sidings and chimneys meet, exterior corners, the point where the foundation and exterior bricks meet, and outdoor faucets.
- Check for cracks & gaps inside – Main spots that you should look for include attic hatches, electrical outlets, baseboards, cable and phone lines, pipes and wires, fireplace dampers, gaps around window or through-the-wall units, electrical and gas service entrances, and vents, and fans.
- Inspect door and window frames – See if you can find visible cracks around doors and windows. Daylight peeking through door and window frames indicates air leaks. Also, try rattling these areas; any movement would also point out to air leaks.
3. Building Pressurization Test
If visual inspection did not work that well for your home, try the building pressurization test. This test makes it easy for you to detect air leaks.
- Choose a windy day for this test.
- Turn off water heaters, furnaces, and all combustible appliances in your home.
- Close windows, doors, and fireplace flues.
- Then turn on all the exhaust fans in your house. You can also use a big window fan to suck the air out of your home.
- After that, light an incense stick and move it around common air leak sources. If you feel that the smoke is sucked out or is blown in the room, there’s a leak.
4. Air Leak Detectors
You can also use air leak detectors to identify leaks. A smoke pencil air leak detector can be used by directing them at potential air leak sources. It produces smoke and can help you see where the air is going. Ultrasonic air leak detectors use ultrasound waves to signal whether there is a leak.
5. Use Flashlight Method
This method works best when it’s dark outside. Turn of all the lights inside your home. Then shine a flashlight where you suspect the presence of gaps and cracks. Then, ask someone to go out and watch for rays of light seeping through. This indicates where the cracks are inside your home. One downside is that this technique will only work with large gaps and cracks.
6. Check Dirty Attic Insulation
Air leaks in the attic cause dusty air to enter your home, which results in darkened insulation areas. In winter, you may see frosty areas where warm, humid air condenses and freezes as it comes in contact with cold attic air. So, do check for these signs in your attic to detect air leaks.
7. Dollar Bill Technique
This technique of finding air leaks in your house just requires a dollar bill or a piece of paper.
Shut a door or a window on a dollar bill. If you can easily pull it through, you have an air leak!
8. Use Paper Technique
Hold a piece of paper near potential gaps;the paper will move if there are drafts around window frames or electrical outlets.
How to Air Seal Your House
Now that you have found all the sources of air leaks, it’s time to get to work. Start with windows and doors where air leaks are easy to seal and then move on to attic and basement areas.
Note: Air sealing may trap harmful indoor air pollutants and poisonous gases such as carbon monoxide, deteriorating home air quality. It is recommended to get your home tested by an energy professional before sealing all the leaks.
Material Required
- Disposable clothes
- Protective eye gear
- Dust mask
- Insulating materials
- Gloves and hats
- Silicone or acrylic latex caulk
- Caulk gun
- Weather-stripping
- Foil tape
- Duct mastic
- Aluminum flashing
- Garbage plastic bag
General Tips for Sealing Air Leaks in Your House
- Always wear a dust mask or a respirator when insulating air leaks, especially when working in the attic.
- Wear disposable coverall gloves and a hat when working.
- Keep a flashlight nearby when working on air sealing projects.
- Inspect your old insulation for spots and use spray foam to seal them.
- Install carbon monoxide (CO) alarms if you don’t already have them installed.
- Use foam gasket behind electrical outlets and switch plates on the wall.
- Keep the fireplace damper closed in hot weather.
- Seal gaps and cracks around fireplace chimneys, furnaces, and water heater vents with fire-resistant materials such as sheet metal or furnace cement caulk.
- Use foam sealant on larger gaps around baseboards and other air leak spots.
Air Seal Your Doors & Windows

Air leakage from windows and doors can greatly impact your home climate. Sealing the cracks and gaps in your doors and windows can minimize energy wastage and reduce AC costs. Moreover, to enjoy a perfect home temperature all year round, opt for complete window insulation.
There are variety of ways you can air seal your doors and windows:
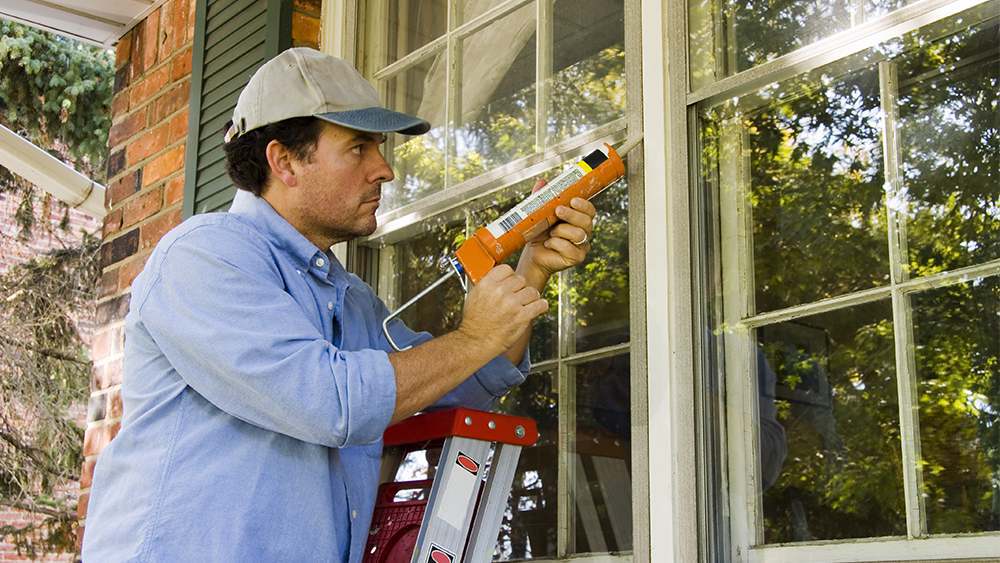
- Use Caulk – The caulking material seals all the air leaks through cracks and joints that are less than 1 inch between stationary components. Fill in your caulk gun and apply a smooth layer to all joints in doors and windows.
- Apply weather-stripping – To fill in air leaking gaps, apply adhesive-backed foam weather stripping to the sash on double-hung windows. The foam will compress to fill in the gaps. For doors, seal cracks between the door and side jambs with long pieces of weather-stripping.
- Use Spray foam insulation – This type of insulation that fills in all the nooks and crannies and minimizes heat loss.
- Install draft stoppers – They fill in a large gap where the lower window sash meets the sill.
- Use draft guards – Place them at the bottom of the door to prevent air leakage.
Seal Up the Wall
Once you have tackled doors and windows, check the cracks and gaps in the wall where air can get through.
- Install foam gaskets – Use them around gaps around electrical outlets and light switches.
- Use childproof plug covers – Install them around your unused outlets to prevent cold air from coming in.
Seal Air Leaks in the Attic
Air leaks in the attic are a major source of heat loss in your home. Even if you have attic insulation installed, some openings can appear that can leak air over time. Air sealing the attic can help stop major air leaks and increase comfort in your home.
- Use foam and caulk to seal small gaps – Seal openings around plumbing vents and electrical wires with expanding foam and use caulk to fill small gaps around electrical boxes.
- Seal around furnace flues – The opening around a furnace or water heater flue or chimney can be a major source of air leaks. These gaps should be sealed with lightweight aluminum flashing and special high-temperature caulk. Caution: Furnace flues can be extremely hot, so be careful when dealing with them.
- Seal air leak around the chimney – The building codes require a minimum of 2 inches between the wood framing and a chimney, and this gap can be a big source of air leaks. Use a combination of metal flashing and caulking to seal this gap.
- Fix open cavities – Finished attics often have open cavities in the floor framing under the sidewalls or knee walls. The rigid foam board sealed with spray foam works quite well for covering open cavities.
- Replace recessed lights – A 6-inch hole cut into the ceiling to hang an incandescent bulb can heat your attic and cause ice dams in winter. Moreover, this gap can be a source of air leaks. The solution is to replace your old recessed lights with air-tight, insulated can models.
Seal the Basement & Crawl Spaces

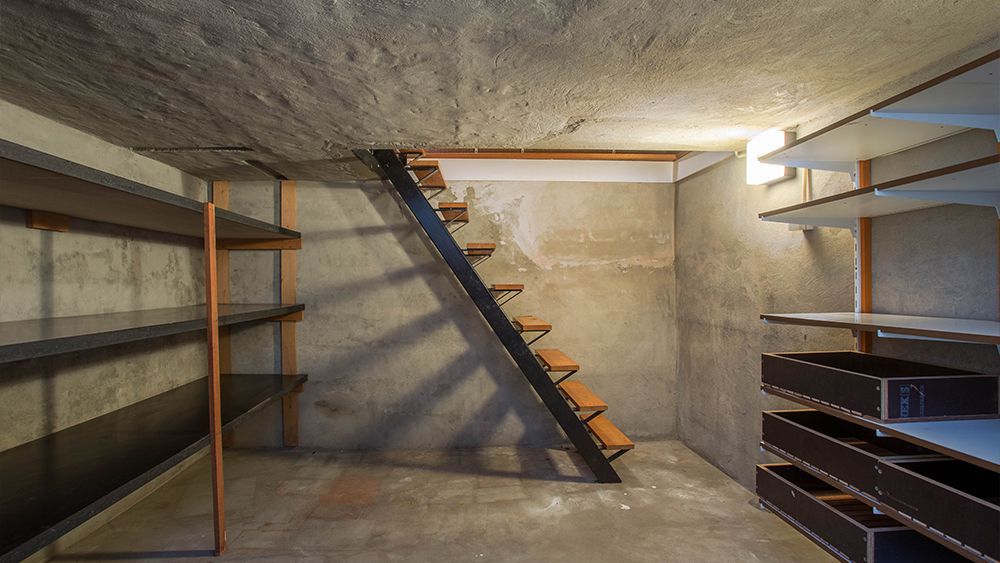
As cold air sinks, it enters your home through leaks in the basement and crawl spaces. This makes your HVAC system work harder, making it difficult to maintain perfect thermostat settings.
- Seal & insulate around rim joists – Outside air can come in through leaks where house framing sits on top of the foundation. This perimeter framing is rim joist, and it has numerous cavities creating opportunities for leakage. Seal the top and bottom of the rim joist cavities. Caulk can seal gaps and cracks that are ¼ inch and less. Use spray foam to fill large gaps. After air sealing, insulate each cavity with rigid foam insulation or fiberglass batts.
- Basement wall – If your basement walls have any obvious cracks, fill them with silicone caulk. Use low-expansion polyurethane foam to fill holes near-wall penetrations such as those around electrical lines, plumbing pipes, and vents. If the walls are made of stone and mortar, don’t use spray foam or caulk. Instead, remove any loose material from these areas, and use mortar to seal.
- Basement ceiling – Cover large ceiling holes with plywood, drywall, or rigid foam, and seal the edges with caulk or spray foam.
If you want to tackle home insulation alongside sealing the leaks, read our thorough guide on home insulation.
Seal Your Ductwork
Most homeowners don’t think about sealing the ductwork, but it is crucial in making your house more energy-efficient. Ducts distribute cold/hot air in your house, and if they have cracks, the conditioned air can easily leak. As a result, it will become difficult to achieve your desired temperature.
- DIY method – It entails using foil tape to seal the leaks and painting duct mastic to the joints. After that, fiberglass insulation is applied to cover the ducts completely.
- Professional method – Professionals seal the ductwork from inside by using blowing in liquid rubber sealant. This plugs up all the air-leaking holes and cracks.
Finding and fixing the air leaks in your house is one of the top energy-efficient upgrades that you can make for greater savings. So, take out your flashlight, fill in your caulking gun and gather all the related materials to start the air sealing project!


