
Key Takeaways
- Insulating your garage allows for temperature control, making it suitable for various uses such as a home gym or an office.
- Insulation also safeguards your belongings from extreme temperatures, preventing damage and humidity buildup.
- Choose insulation based on your garage’s needs: rigid foam, fiberglass, spray foam, cellulose, or radiant barriers.
Most homeowners use their garage for more than one purpose. You can use it as a storage shed or convert it into your home office or even a home gym.
However, as garage space is usually not weatherproofed like the rest of your house and is often neglected, it ends up turning into a sauna in the middle of a hot day. The temperature can rise to an extreme level, making it uncomfortable for any activity, unfortunately. It can also reach freezing temperature during winter, causing harm to equipment and water pipes.
Even a garage air conditioner won’t be able to maintain your ideal temperature if your space is unable to retain the cooled air.
So, if you’re looking to take advantage of your garage space by transforming it into another room, garage insulation is something worth looking at.
Insulation slows down heat transfer through the walls, ceiling, and floors of your garage, which is great for all climates and whether you are heating or cooling the space.
Even if you simply want to use your garage to store items or park your car, insulation can still be a great help. Garage insulation is very effective to save money on energy costs and make for better storage space.
Whether you wish to cool your garage or heat it, insulating a garage isn’t difficult to do on your own.
- Benefits of Insulating Your Garage
- How to Measure Insulation Effectiveness - R-value?
- 5 Types of Insulation for Your Garage
- Air Sealing Before Garage Insulation
- Tools Required for Garage Insulation
- Safety Precautions for DIY Garage Insulation
- Things to Keep In Mind When Insulating Your Garage
- How to Insulate a Garage Ceiling?
- How to Insulate a Garage Door?
- How to Insulate Garage Walls?
- How to Insulate a Garage Floor?
Benefits of Insulating Your Garage
Let’s look at the key benefits of garage insulation:
- You can use the garage all year round as your home gym, project workshop, or home office. An insulated garage retains cold when it’s hot outside and warmth when the outside weather is cold, provided you have proper heating/cooling systems installed.
- Insulation minimizes energy loss and helps lower bills. You will especially notice a difference if there are boundary walls between your house and the attached garage.
- Insulation can help protect your items from humidity and rust. So you can store all your temperature-sensitive paints and tools without worry.
- If your garage is attached to your house, any carbon monoxide from your vehicle trapped there can seep inside your home. Garage insulation can prevent this and protect your family from its serious health impacts.
- Garage insulation boosts your home’s resale value as buyers notice this detail and mark it as an indicator of a high-quality home.
- Insulating your garage also helps with noise pollution. For example, if you live in a noisy area and have set up your home office in the garage, insulation can help block out noises. Additionally, if you use different power tools in this space, it’ll help muffle those sounds as well.
How to Measure Insulation Effectiveness – R-value?
R-value is the measure of insulation effectiveness. It varies based on the type, thickness, and density of the insulating material. A higher R number means better insulation and energy efficiency for your garage. But, of course, materials with a higher R-value will also be more expensive.
5 Types of Insulation for Your Garage

Before you attempt to insulate your garage, you should have a thorough understanding of different types of insulation materials.
While each type helps you maintain the temperature, they come with their own pros and cons.
| Insulation Type | Pros | Cons |
| Rigid Foam |
|
|
| Fiberglass |
|
|
| Radiant Barriers and Reflective Insulation |
|
|
| Cellulose |
|
|
| Spray foam |
|
|
1. Rigid Foam Insulation
This type of insulation has a high R-value. You can find it in a 4 x 8-foot sheet of thickness ranging from 0.5 to 4 inches. It is moisture-resistant and does not crack or split in high humid areas.
Rigid foam insulation is considered an excellent choice for garage doors and thin walls. It is not, however, suited for thick floors and walls. It is also DIY friendly. If you are looking to renovate your garage and add insulation layers, this one would be great to start with.
Your best choice to make any mini-split, window,
or portable AC smart. Enhance your comfort and savings.

2. Fiberglass Insulation
This is the standard insulation type used in houses, especially in garage spaces. Fiberglass insulation is the cheapest type and easiest to install, making it a perfect option for a DIY project. You can get fiber insulation in the form of:
- Bats and blankets to fit the wall studs and joists in the ceiling and floor of your garage.
- Loose fill fiberglass can be blown into place, especially to fill gaps in walls and ceilings. For example, if your garage’s attic has open space above the ceiling, it can be effectively used to fill it.
Special machinery can be rented out to blow it in, or you can also pour it in manually, though this will require a lot of effort.
For garage walls, you can use fiberglass covered in plastic film so that the insulation looks more polished and does not catch dust.
3. Radiant Barriers and Reflective Insulation Systems
These insulation systems work by reflecting heat and can keep the space cool in summers even without an AC. However, they are different from other insulation types; an R-value does not measure their effectiveness.
Radiant and reflective insulation is made by kraft paper or polyethylene bubbles. Then they are wrapped in aluminum foil which acts as a reflective barrier.
You can use it on garage doors to reflect heat. They are especially useful for attic insulation in warmer regions.
4. Cellulose Insulation
Cellulose insulation is made from recycled paper and chemically treated to make it fire-resistant. Then, it is blown in cavities and gaps through a blowing machine.
It is loose-fill insulation and, therefore, only suited for finished spaces. You can use it on the finished garage ceiling and walls.
5. Spray Foam Insulation
Spray foam insulation does an excellent job at air sealing. It has the highest R-value but is least DIY friendly.
It is pretty expensive, and you should only use it in a garage if you plan on using it as a living space. You can use it just to cover nooks and crannies.
Air Sealing Before Garage Insulation
An uninsulated garage has lots of air gaps. So, in addition to properly insulating your floor, ceiling, walls, and doors, filling those air gaps is also necessary. If you fail to do that, your insulation won’t make much of a difference.
You can seal those gaps before starting your garage insulation project. First, spot these gaps and then go around your garage with a can of spray foam insulation and fill the gaps and holes.
Tools Required for Garage Insulation
Here is a list of tools that you may need to perform DIY garage insulation perfectly. Gather all the tools you will require to get the job done:
- Insulation of your choice
- Ladder or scaffolding
- Construction tape
- Utility knife
- Measuring tape
- Utility screws
- Drill driver
- Hammer
- Screwdriver set
- Face mask
- Eye goggles
- Gloves
- Staple gun
- Vapor barrier
- Expanding foam to fill in the spaces
- Retainer pins
- Sealant gun
- Plywood or drywall
- Drywall screws
- Weatherstripping
- Edging strips
Safety Precautions for DIY Garage Insulation
If you are DIYing your garage insulation, you should always adhere to the following safety precautions:
- Put on a facemask to prevent insulating material from getting into your lungs
- When using spray or blow-in insulation, you should always wear protective eyewear.
- Gloves should be put on when handling insulating materials.
Things to Keep In Mind When Insulating Your Garage
Before you start the insulation process, there are things that you need to take care of, such as controlling moisture on the concrete floor and not covering the electrical boxes.
- If you are insulating all by yourself, it’s best to purchase a scaffolding for safety and get the work done smoothly.
- Install vapor barrier to prevent moisture from accumulating on the insulation covering.
- Make sure not to cover the electrical boxes installed on the garage ceiling. Also, don’t fix the insulation tightly around the boxes.
- Concrete is a porous material and can quickly transfer moisture. Therefore, if you insulate without putting on a vapor barrier, water can seep through the concrete slab and affect the insulation.
- All hanging objects need to be removed to prevent damage to your wall insulation.
- Any cracks, holes, or gaps in the exterior wall should be sealed before installing the insulation to prevent moisture damage and mold growth.
- The foam insulation and plywood added on top can add a significant amount of thickness to the floor. This leaves a raised area from the doorway to the garage. You would need some edging strips to smoothen the edges.
- Leave 1 ½ inch of air space between the fiberglass insulation and the underside of the wood roof sheathing when insulating the ceiling. This will help the water vapor to dry out and prevent mold growth.
- Keep the insulation three to five inches away from the lights. Installing it too close to the light sources can cause a fire.
- Don’t forget to seal the bottom of the garage door and windows using weather stripping.
How to Insulate a Garage Ceiling?
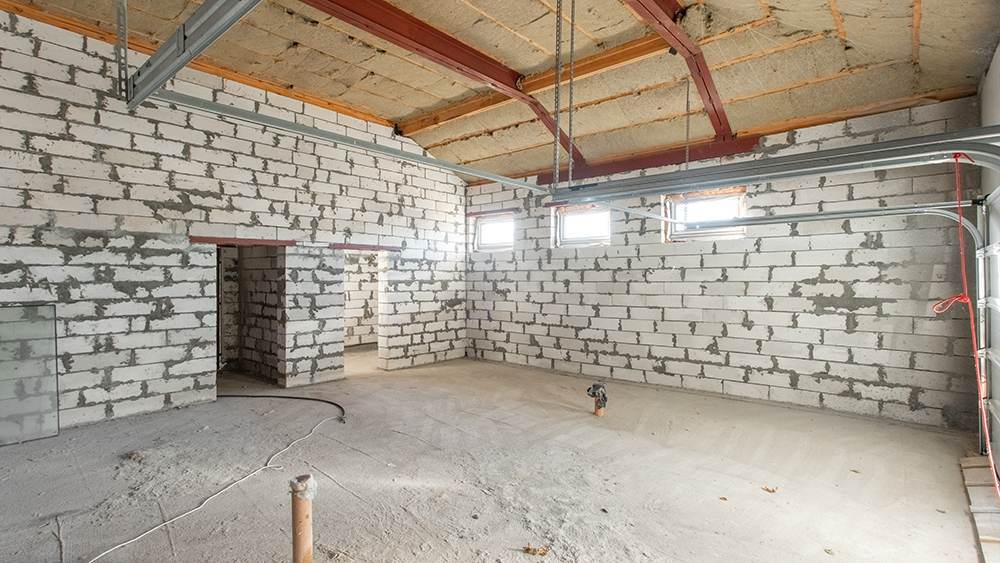
Garage ceiling insulation is necessary to reduce energy loss, especially in the colder months. Hot air rises upwards, and if there is no insulation, all the heat will be lost through cracks and gaps in the ceiling.
Depending on the geographical requirements, a garage ceiling requires a minimum of R-38 insulation.
Steps to Insulate a Garage Ceiling
- Prepare your ladder or scaffolding. If you are using a ladder, ask a family member or a friend to help you out.
- Take measurements. Measure the length and width of the garage ceiling. And then multiply length and width to get the area. Then measure the distance between joists and how deep they are. They are usually 8-10 inches in depth.
- Cut the insulating material according to the measurements you have taken.
- Install the insulation in the ceiling and secure it using a staple gun.
- If any corner is left, cut the insulation to its size to fit there correctly. You can also use expanding foam to fill in the gaps.
- Finish the process by covering the ceiling with plywood or drywall.
How to Insulate a Garage Door?
Adding insulation to your garage door can keep your garage 20 degrees cooler in summer and 10-12 degrees warmer in winters.
You can find fully insulated doors in the market; however, they are pretty expensive. By installing it on your own, you can save money and still prevent energy loss. For hot regions, you can use rigid boards with reflective foil to reflect the heat away.
Installing insulation on a garage door is different as it does not have frames to hold the insulation firmly. Instead, you would need adhesive retainer pins to hold the insulation in place.
The R-value for a garage door is usually between R-18 and R-12 since space allows only for a thin layer of insulation.
Steps to Insulate a Garage Door
- Clean the door panels with cleaning sprays.
- Measure the height and width of each panel as they may differ in size.
- Cut the insulation according to the measurements.
- Find the spot that is 12 inches from the edge of the panel and midway between the horizontal rails.
- Then take the retainer pin and install and press it in the panel.
- Install two retainer pins in each panel.
- Then, place the insulation on the panel and push it against the retaining pin.
- Take the pin cap and push it over the pin.
- Repeat on all panels.
- After that, install the weather stripping over the insulation and secure it with nails.
- Uncrimp the previously installed bottom seal and install a new vinyl seal.
- Test the functioning of your door. It should stay in place if you lift it and then let it go.
- If it is not secured and falls off, contact a door service company for adjustment.
How to Insulate Garage Walls?
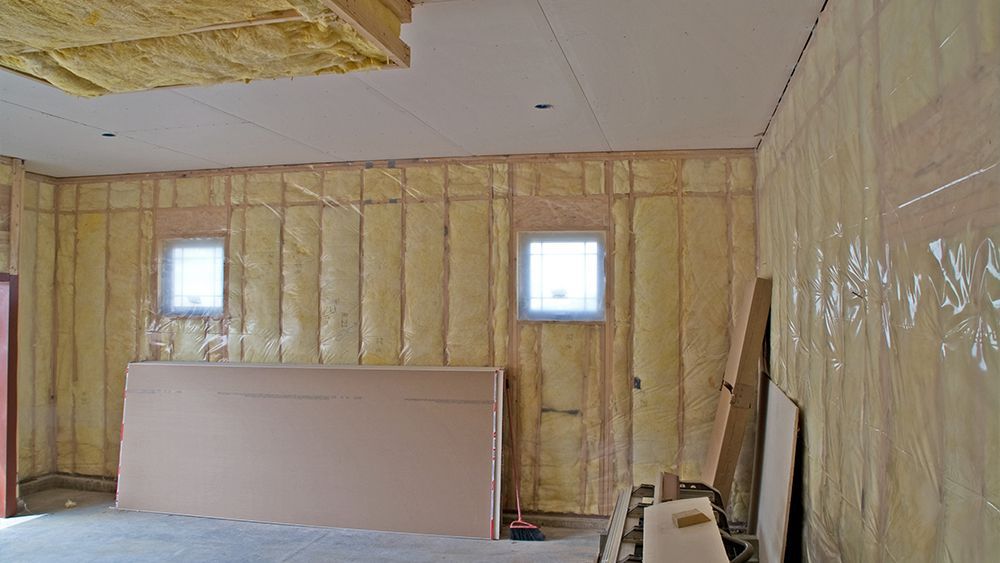
Garage walls are usually not adequately insulated, especially if the garage is separate from the rest of your house.
So, if you plan on using a garage other than parking your car, you should go for wall insulation. If not insulated, it can disturb the cooling/heating process inside your garage.
Fiberglass foam insulation is a more suitable type for garage walls.
Most material that can be fit in the walls falls anywhere between R-13 and R-15.
Steps to Insulate Garage Walls
- Remove screws and hooks from the walls. You would require a hammer and a screwdriver for that.
- Remove the wall covering and clean the area that is to be insulated.
- Check for gaps and cracks in the walls. Water can stay in the holes and cause mold growth.
- Apply a sealant to cover these areas.
- Allow the sealant to dry properly before installing insulation.
- Start insulating with fiberglass insulation.
- Properly cut the insulation to fit the gaps between the wall studs instead of forcing it to fit the area.
- After you are done with insulating, apply a vapor barrier over the insulation and secure it by stapling.
How to Insulate a Garage Floor?
A rough, uninsulated concrete floor is a big no when converting your garage to a workstation or a workshop.
An insulated garage floor makes all the difference. It makes the area more comfortable to work in and can also make your garage more energy efficient.
Steps to Insulate a Garage Floor
- Start by covering the floor with a vapor barrier. Then, go for polyethylene, which is a great moisture barrier.
- Then lay the sheet of rigid foam insulation over the vapor barrier. Using compression-grade rigid foam panels is preferable.
- Use a sharp knife to cut the pieces according to the floor size.
- Lay plywood sheets on top of the insulation layer. Make sure to run perpendicular to the long dimension of the foam so that the plywood seams do not align with the foam seams.
- Space the panels 1/4 inch apart. Leave a ½ inch gap around the perimeter to account for seasonal contraction and expansion of the plywood.
- Add a second layer of plywood over the top.
- Fasten the two layers of plywood with utility screws.
- If you will still be using the garage for vehicle parking, you will need to smoothen the area between the raised flooring and the driveway. Use edging strips for this purpose.
- Then, you can seal the floor by using tiles or mats. You can also paint the plywood or coat it with epoxy.
By adding insulation to your garage, you protect the space against harsh temperature changes. Moreover, garage insulation allows you to have a comfortable working space all year long!
Bonus Tip: If you have a mini-split, portable, or window AC installed in your garage, use a smart thermostat for ductless systems. It’ll make your unit smart, and you’ll be able to maintain temperature remotely.
Time to use your garage space comfortably all year long!







2 Comments. Leave new
Does the second layer of plywood get laid in an opposite direction then the first? When insulating the floor? If so does it still require 1/4 gap between pieces?
I really like how you stated that spray-foam insulation is one of the best in terms of airtightness. That could really be a big benefit to us since we’re trying to make our house as protected from moisture and pest problems as possible. Once I start working on my garage, I’ll definitely ask a foam insulation expert to help me out.