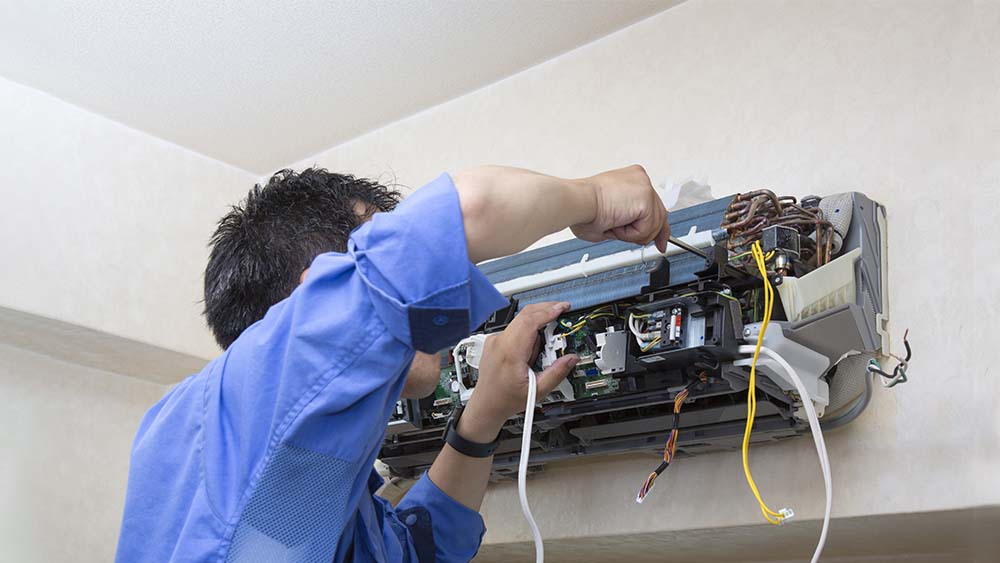
Key Takeaways
- Common AC issues like no cooling or uneven temperatures can often be fixed by checking the thermostat, cleaning or replacing filters, and clearing vents.
- Issues such as refrigerant leaks or compressor failure require professional attention.
- Regular maintenance, like cleaning filters and coils, can help prevent common AC issues and extend the lifespan of your unit.
Dealing with a scorching hot day only to come home to a struggling air conditioning unit can be incredibly frustrating. This is when you start looking for home air conditioner repair solutions right?
However, before you start frantically searching for HVAC repair companies, take a moment to assess the problem and try some DIY solutions. Air conditioner repairs can be pricey, and you may have to wait for days or weeks for an HVAC professional appointment. With a little know-how about HVAC systems, you can fix most of the problems yourself in a matter of hours and save yourself time and some major bucks.
Whether you’re a seasoned DIYer or a new homeowner ready to tackle minor AC repair tasks, this guide has all the information you need about common AC issues and how to DIY simple home air conditioner repairs.
Common AC Problems Requiring Repairs
Your air conditioning units can sometimes run into problems. Refrigerant leakage, inadequate cooling, and condenser turning on/off frequently are just a few examples of common issues that can occur. Here are some ideas for what can be needing a repair job for your AC:
-
Faulty Thermostat or Incorrect Thermostat Settings
The thermostat serves as the control center for your entire HVAC system. It regulates and monitors the temperature in your home. However, for it to work properly, it needs a reliable power source. This can come from batteries, a low-voltage wire, or both. If there are any power issues, your thermostat won’t function, and your home’s climate will suffer as a result.
Another factor to consider is the placement of your thermostat. If it’s installed in an area where it’s exposed to direct sunlight or near a drafty spot, it may give inaccurate temperature readings. This can throw off the functioning of your HVAC system and make it difficult for you to maintain a comfortable environment.
To ensure that your air conditioning is working efficiently, check the mode settings on your thermostat. Accidentally switching to heat mode on a scorching summer day can hinder the cooling capabilities of your AC. If your unit is correctly set to cool, but you’re still experiencing problems, the thermostat’s high temperature setting might be the culprit. This can prevent your AC from turning on when it should.
Related: Thermostat Not Working Properly? 14 Easy Fixes
-
Condenser Isn’t Functioning
The condenser is the outdoor part of your air conditioning unit. It houses the compressor, which is the most significant part of your AC. If there’s an issue with the compressor, you will experience poor HVAC airflow, and in the worst scenario, your unit won’t produce cool air at all. The condenser can also stop working due to a faulty motor, or it may not be receiving enough power. Also, if you are hearing any loud, strange AC noises, it can also mean condenser problems. You cannot repair the condenser yourself, and it’s recommended that you consult a professional to get it checked.
-
Condenser Turns On and Off Repeatedly
If your AC is turning on and off repeatedly, it could be due to some obstruction around your condenser. It can be blocked by flowers, trees, or bushes growing around your outdoor unit,
Your condenser can also turn on and off repeatedly due to faulty wiring, dirty coils, or a combination of these factors.
While trimming back the foliage around the condenser might do the trick, cleaning the condenser or evaporator coils is also essential. If you suspect damaged wiring, it can be best to leave the repair or replacement to an AC repair professional.
-
Hot & Cold Spots
Sometimes, you notice that some of the areas in your home are cooler than others. Uneven cooling is typically caused by closed or clogged vents blocking the flow of air to certain areas of the house. By checking and cleaning the vents, you can ensure that there are no obstructions and that the air is able to circulate efficiently throughout your home.
Related: Air Balancing: 16 Ways You Can Fix Hot & Cold Spots And Maintain Even Temperature
-
No Cooling

If your AC seems to be running fine, but you feel like your home temperature hasn’t dropped, your unit may not be cooling at all. There can be many reasons for this – clogged filters, dirty coils, a blocked condensate drain line, low refrigerant levels, or a faulty compressor.
You can clean the filter coils and clear the drain line on your own; however, you will have to contact an HVAC technician if the issue is related to a compressor or leaking refrigerant.
-
Inadequate Cooling
While dirty coils or clogged filters are often the culprits behind your AC not working, there’s another potential issue related to your AC size. If your unit is too small for your house, your HVAC unit will struggle to achieve your preferred temperature settings.
Here’s everything you need to know about correctly sizing your air conditioner.
-
Refrigerant Leak
A refrigerant, also called a coolant, is an important of your HVAC system. Most systems use Freon as a coolant. It is responsible for absorbing heat from your home and expelling it outdoors.
Your unit never uses up the refrigerant, and the levels only get low in case the refrigerant line gets damaged, and there is a leakage. It leads results to poor cooling as heat transfer cannot take place. Moreover, a refrigerant leak also makes your AC work harder, leading to increased wear and tear and high electricity bills.
Never attempt to handle a refrigerant leak yourself, as it can be hazardous.
How to Repair Your Air Conditioner
Here are some simple DIY home air conditioner repair steps that can help fix your unit without having to pay for costly repairs.
1. Check the Breaker Panel
A power surge can cause the AC circuit breaker to trip or fuse to blow out. If your air conditioner suddenly loses power, first check the circuit breaker. Flipping the breaker back into position or replacing a blown fuse often solves the problem.
Here’s how to check for a blown-out fuse:
- Take your multimeter and set it to the lowest ohms.
- Touch the red and black leads to the opposite sides of each fuse.
- The fuse is working fine if you get a numerical reading.
- A zero, minus, or infinity symbol signals a blown fuse.
It’s important to check why your circuit breaker tripped in the first place. If the issue continues to happen, the underlying electrical problem may be more serious, so it’s best to seek the assistance of a qualified professional.
2. Clean Your AC Filters
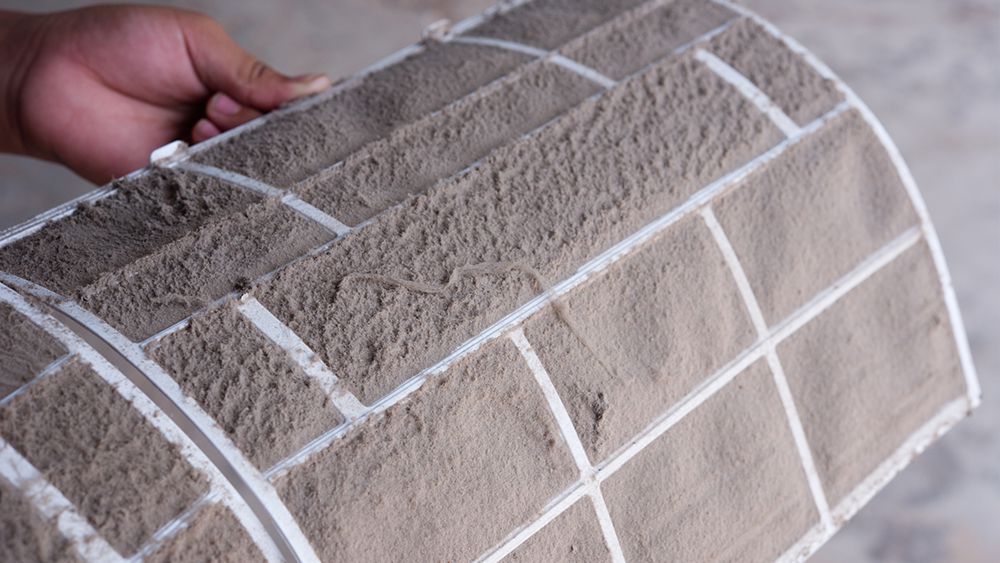
Regularly cleaning and replacing your air filters is an easy and important step to keep your system running efficiently and effectively. AC filters also help improve your indoor air quality as they trap harmful air pollutants and prevent them from entering your home.
It’s recommended to clean your filters every 2 weeks (an average of 200-250 hours of usage) and replace them every 3-4 months. When installing a new filter, make sure it’s the perfect size and do check the filter rating for the highest efficiency.
Related: MERV Rating – Is Higher Always Better?
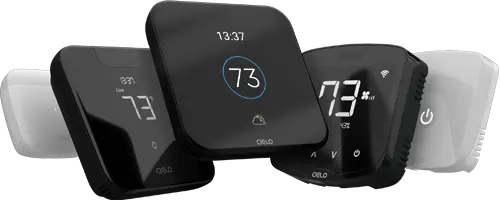
Pro Tip: It’s easy to forget to check and clean the air filter regularly, which can cause a decline in air quality as well as efficiency. This is where smart thermostat for room ACs come in handy. They can monitor your air filter cleanliness status and let you know exactly when it’s time to clean it.
3. Clean the Outdoor Unit
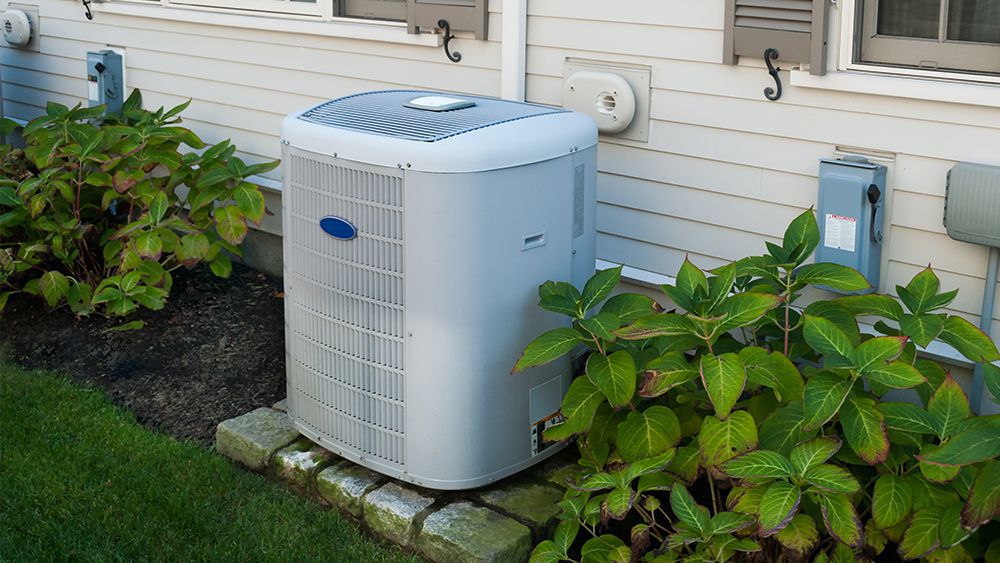
If you have installed your outdoor unit in your garden or if it’s surrounded by shrubs, then extensive foliage growth during summertime can impact its performance. As the trees and bushes grow, they can encroach on the space around the unit, causing blockages and obstructions. To ensure your unit runs smoothly, experts recommend keeping at least two to three feet of space around the unit and five feet above the unit. Also, trim down the bushes or any other kind of foliage to prevent overheating of the compressor.
4. Test Your Thermostat
If you are air conditioner stops working all of a sudden, check the thermostat batteries if you have a battery-powered thermostat. Sometimes, replacing dead batteries is all it takes to restore power. If that’s not the case, check your thermostat wiring. If there are any loose connections, your thermostat cannot communicate with your HVAC system. Take off your thermostat cover and make sure all the wires are properly connected.
If there aren’t any power issues, the issue may be related to your thermostat settings. Check if your thermostat is set to high temperature. Lowering the temperature can help fix the issue.
Another reason why your AC isn’t working can be related to your thermostat placement. Consider moving your thermostat to a central location in your home where you spend most of your time. Make sure it’s away from sunlight, heat-generating appliances, and drafty windows.
5. Clean Your AC Coils
AC coils play an important part in the air conditioning process and are responsible for transferring heat from your home to the outside air. There are two types of coils – evaporator coils are located inside the air handler, and they absorb the heat from your whole, while condenser coils are located in the outdoor unit and release the heat outside.
Dirty coils can significantly decrease the cooling power of your air conditioner. If the issue is not resolved, it can also cause your unit to cycle on and off constantly.
To clean the coils, you can use a brush, a mild homemade detergent solution, or a commercial coil cleaner. You can also use compressed air to clean them; however, this can only be used with condenser coils. Using it on evaporator coils can lead to dust blowing inside your house. Here’s a detailed guide to AC coil cleaning.
After thoroughly cleaning the coils, disconnect the drain line and use a wet/dry vacuum to remove any obstructions.
6. Remove Ice Buildup
Is your air conditioner not cooling your home effectively? Ice buildup may be the culprit.
When your AC runs for too long at low-temperature settings, it can lead to ice formation. But don’t worry, the AC repair in this case is easier than you think. Just switch off the cooling system and let the fan do the work, or turn off the entire HVAC system. Soon enough, the ice will melt on its own, and you can run your unit as usual.
Related: Air Conditioner Freezing Up? Explore the Causes of AC Freezing and What You Can Do
7. Clean the Vents
If your vents are blocked, it can result in uneven cooling/ heating. Check your vents for any kind of obstruction that may be interfering with the airflow. Make sure there aren’t any furniture pieces or rugs on top or in front of the vents.
8. Replace the Capacitor
A capacitor is an AC component that stores electricity and provides an initial power jolt to help your unit start-up. Plus, it protects the fan motor from voltage fluctuations.
If your unit is having issues turning on or it is turning on and off abruptly, chances are your capacitor has stopped working. Over time, with use, they can degrade and eventually fail completely. This can affect the functioning of your compressor and condenser and may even lead to premature failure. Frequent power outages can result in capacitor failure. Also, overheating of the outdoor unit can also interfere with capacitor functioning.
To avoid any AC problems, it’s recommended to have your capacitor replaced every five years.
How to Replace Your Capacitor?
Before replacing your capacitor, make sure you have some experience in handling electric components and can safely handle electrical repairs. A capacitor stores high-voltage current that can cause serious injury if proper safety precautions aren’t taken. It’s generally recommended that you contact a professional HVAC technician to handle any capacitor replacements.
Caution: Never try to replace the capacitor before discharging the stored energy.
- Turn off your unit.
- Go where your outdoor unit is installed; that’s where you will find the access panel. Remove it using a screwdriver.
- Take a picture before disconnecting anything.
- Discharge the energy stored in the capacitor. For that, remove the capacitor from the retaining bracket. Then touch an insulated screwdriver between the Herm or H terminal and the Common or C terminal. Do the same between the FAN or F terminal and the C terminal. For single-mode capacitors, just make a short between the two terminals.
- After you have discharged the capacitor, use a pliers to pluck one wire at a time from the old capacitor and snap it onto the corresponding tab of the new capacitor. Make sure that the crimp connectors snap tightly onto the capacitor tabs.
- If the connectors are not tight, remove each connector and bend the rounded edges to make a tighter fit.
- After you have swapped all the wires, secure the new capacitor.
- That’s it! You have successfully replaced your capacitor.
9. Examine the Air Ducts
Even after cleaning your vents, you feel like your airflow hasn’t improved; it can be due to dirty air ducts. Check your ducts for any kind of debris buildup. You can try vacuuming a short stretch of ducts. For longer runs, call a professional who can clean thoroughly clean your entire ductwork.
Related: AC Ducts Guide for Cleaning and Maintenance
10. Replace the AC Contactor
A contactor controls the flow of electricity to your AC unit. It can wear out over time, and it’s best to replace it every five years to prevent problems.
Here’s you can replace the contactor:
- Unscrew the old contactor in the condensing unit.
- Move the wires from the old one to the new contractor.
- Take off the connector from the old contactor and move it to the same place on the new one.
- Secure the new contactor in its place.
11. Inspect Your Refrigerant Lines
Inspect your refrigerant line and check for leaks. If you find any holes or worn-out insulation, contact an HVAC professional. Never try to fix the leaks yourself, as Freon, a commonly used refrigerant, is a toxic gas, and inhaling it can lead to various health issues.
DIY vs. Hiring an Air Conditioner Repair Company
When it comes to home air conditioner repair, the question arises – should you DIY or hire a local repair company? While there are some routine maintenance tasks that you can easily perform, such as replacing the AC filter, cleaning coils, and testing your thermostat, it is important to acknowledge that certain tasks should be left to the professionals. Attempting to repair the refrigerant lines, faulty AC compressor, or electrical wires can be dangerous and can result in costly damage. If you don’t have the tools and knowledge required to fix complex AC issues, it’s best to reach out to a local air conditioner repair company for help.
When to Hire a Home Air Conditioner Repair Company?
Ideally, professional AC tune-ups should be performed at least once a year, but if you live in warmer climates or use your AC unit heavily, it may be necessary to schedule inspections more frequently. Springtime is a great time to consider scheduling your maintenance appointment. You can then add in six months from there for your second maintenance. It’s better to take action sooner rather than later to schedule the appointment, as waiting until the peak of summer could mean limited availability of HVAC professionals.
Related: The Ultimate Spring HVAC Maintenance Checklist
Things to Consider When Selecting an AC Repair Company
When looking for an air conditioner repair company near you, make sure to read customer reviews and ask for proof of licenses and accreditations. Moreover, getting referrals from people you trust can be a great way to find a reputable company.
-
License
Make sure that the company you are thinking of selecting has a valid license from your state’s HVAC licensing board.
-
Reasonable Rates
One of the most important things when selecting an AC repair company is whether they offer reasonable rates. You don’t want to end up spending an excessive and unjustified amount on repairs. Get quotes from a few different repair companies and compare them to figure out the average for your area. Comparing charges will help you figure out if someone is overcharging you.
-
Employee Insurance
Employee insurance is an often-overlooked factor when selecting a repair company. However, if the repairman suffers some injury while repairing your air conditioner, you may end up having to pay for it. Ensure that the company offers on-the-job insurance to all their employees, so you are not liable in case of an injury.
-
Referrals
A good repair company will have many satisfied customers around. Ask people around you which repair company they recommend and have been using for years. The chances are that if a repair company has a lot of referrals, they are worth it.
How Much Does Home Air Conditioner Repair Cost?
According to HomeAdvisor, the average cost of repairing a home air conditioner is between $170 and $639. This figure may vary according to your area of residence.
Some problems are more challenging to fix than others and, as a result, cost more. Depending on your location, detecting and repairing a refrigerant leak can cost anywhere between $225 to $1600. Similarly, replacing a broken compressor is extremely expensive and can cost anywhere between $1200 to $2800.
Home Air Conditioner Repair & Maintenance
When your air conditioner breaks down, you can fix most of the issues yourself and save a lot of money on repairs. To get started, make sure you have the necessary tools and some basic knowledge of how air conditioners work. Begin by isolating the problem and then determining which part needs to be fixed. Although it may seem daunting, with a little research and effort, you can repair your air conditioner yourself and enjoy a cool and comfortable home once again. When in doubt or if something seems too complex, you can call in an HVAC specialist for help. Also, remember that HVAC maintenance is key to guaranteeing maximum AC performance and preventing common problems. Investing in regular AC tune-ups will save you time, money, and headaches down the road.



6 Comments. Leave new
Thank you so much for sharing these DIY solutions for home air conditioner repair! Your tips have made it so much easier for me to tackle issues on my own.
My AC has been making weird banging noises for the past couple of weeks now, and my husband and I want to make sure that we can find the right company that can repair the issue for us. We’ll make sure to keep these tips in mind as we search for an AC repair company.
My ac is leaking, and that is why I’ve decided to start looking for an HVAC contractor that may address the matter. Thank you for sharing the importance of regular maintenance. I agree preventive maintenance will help prolong its life.
I do agree when you shared that there is something wrong with your AC if you have noticed any weird noises coming from your unit. My friend just mentioned the other day that she is worried about her house as the AC unit keeps on making weird sounds due to a lack of maintenance. I will suggest to her find a reliable service that can help fix it as soon as possible.
It’s a good thing that this article was able to explain that the AC’s filter must be changed when needed. I also agree with you that it will be smarter to inspect its airflow.
If I were to have my AC’s leakage fixed, I would make sure to look for repair service. Thank you for sharing here as well the importance of regular maintenance.